
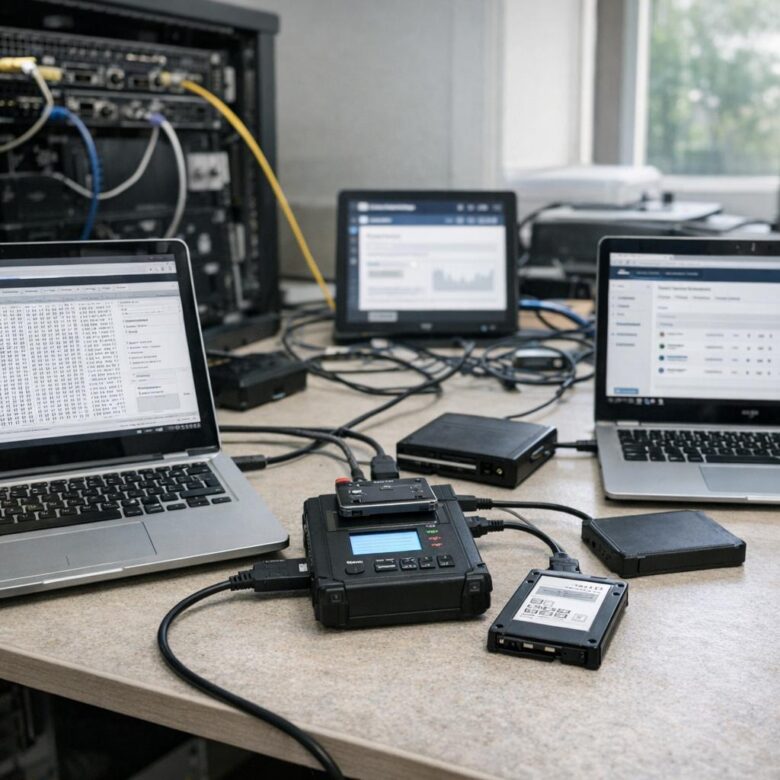
Forensically sound cloud instance images are created to preserve evidence from a compromised virtual machine without changing more data than necessary. In a cloud environment, this usually means capturing disk snapshots, preserving metadata, recording every action, and proving that the copy analyzed later matches the evidence collected at the time of response.
The challenge is that cloud investigations are different from traditional server forensics. You normally cannot remove a physical drive from a data center, attach a hardware write blocker, and image it on a lab workstation. Instead, you work with provider-controlled snapshots, audit logs, IAM permissions, encryption keys, attached disks, object storage, and sometimes volatile evidence that may disappear when the instance is stopped.
A sound process is not only about creating a snapshot. It is about authorization, isolation, documentation, time synchronization, chain of custody, hashing, evidence storage, and repeatable analysis. A snapshot with no notes, no timestamps, no access record, and no integrity checks may be useful for troubleshooting, but it is weaker as forensic evidence.
This guide explains a practical, defensive workflow for extracting cloud instance images in a way that supports incident response, internal investigations, legal review, and later analysis. The examples focus on common IaaS environments such as AWS EC2, Azure Virtual Machines, and Google Compute Engine, but the same principles apply to many cloud platforms.
The goal is to help security teams preserve evidence safely without giving attackers more opportunities, destroying logs, or contaminating the system they are trying to investigate.
Important security note: only collect forensic images from systems you are authorized to investigate. Coordinate with legal, compliance, cloud administrators, and incident response leadership before accessing compromised workloads, copying disks, exporting evidence, or changing instance state.
What Makes a Cloud Image Forensically Sound?
A cloud image is more likely to be forensically sound when the collection process is authorized, documented, repeatable, and minimally invasive. In practice, this means you should know who approved the collection, which instance was captured, which disks were included, when the snapshot was requested, where the evidence was stored, and who accessed it afterward.
Traditional forensic imaging often relies on bit-by-bit acquisition from a physical drive. In cloud environments, investigators usually depend on platform-native snapshot mechanisms. This does not automatically make the evidence unreliable, but it does mean the team must document the provider method, the limits of the snapshot, and the controls used to protect integrity.
A common mistake is treating a cloud snapshot as a complete investigation package. It is not. A snapshot usually preserves disk state, but it may not include memory, cloud control plane activity, deleted provider-side metadata, application logs stored elsewhere, network telemetry, or object storage artifacts. A complete case file often combines disk images, audit logs, identity records, network flow logs, and ticketing notes.
| Evidence Element | Why It Matters | Forensic Caution |
|---|---|---|
| Disk snapshot | Preserves the state of attached block storage at a point in time. | May not include memory, cached data, or external services used by the instance. |
| Cloud audit logs | Show control plane activity such as snapshot creation, instance changes, and IAM use. | Must be exported or locked quickly if retention is short or attacker access is suspected. |
| Instance metadata | Connects the image to instance ID, region, zone, tags, account, and attached disks. | Metadata should be recorded before resources are terminated or renamed. |
| Hash values | Help prove that exported evidence has not changed after collection. | Hash the exported image or restored forensic copy, not only the provider snapshot record. |
| Chain of custody | Documents who handled evidence, when, why, and where it was stored. | Weak custody notes can reduce confidence even when the technical image is valid. |
Prepare Before Touching the Compromised Instance
Before collecting an image, define the scope. Confirm the account, project, subscription, region, instance ID, attached volumes, business owner, suspected incident type, and required retention period. This prevents accidental collection from the wrong system and helps avoid unnecessary exposure of unrelated data.
Use a clean administrative identity with the minimum permissions needed for evidence collection. Avoid using credentials from the compromised instance, because they may already be monitored or abused by the attacker. If possible, use a dedicated incident response role that requires multi-factor authentication and logs every action.
Preserve the current state before making disruptive changes. In many incidents, responders rush to reboot, patch, or delete the instance. That may stop active harm, but it can also destroy volatile evidence, rotate logs, alter timestamps, or remove attacker tools that are useful for understanding the intrusion.
- Confirm written authorization for evidence collection.
- Record the cloud account, project, subscription, region, zone, instance ID, and hostname.
- List all attached disks, including root, data, temporary, and encrypted volumes.
- Check whether the instance uses auto-scaling, ephemeral storage, containers, or external object storage.
- Enable or preserve cloud audit logs before attacker activity can remove or overwrite them.
- Use a dedicated incident response identity rather than credentials found on the compromised host.
- Prepare an isolated forensic storage location with restricted access and retention controls.
During preparation, also decide whether to isolate the instance from the network. Isolation can stop attacker interaction, but aggressive isolation can also disrupt business services or change evidence. A safer approach is often to apply restrictive security group or firewall rules that block suspicious traffic while preserving the disk state for snapshotting.
Step-by-Step Process for Extracting a Sound Cloud Instance Image
The exact commands vary by provider, but the evidence logic is consistent. The responder should document the system, stabilize the situation, collect provider-native snapshots, restore copies into a controlled forensic environment, export or image the restored disks when needed, and verify integrity with hashes.
-
Open an investigation record.
Create a case number or incident ticket before collecting evidence. Record the responder name, approval source, date, time zone, reason for collection, and suspected compromise. This becomes the start of the chain of custody.
-
Record instance and disk metadata.
Capture the instance ID, image ID, region, zone, private IP, public IP, tags, disk IDs, disk sizes, encryption status, security groups, IAM role, and attached network interfaces. This links the later image to the original cloud asset.
-
Preserve relevant cloud logs.
Export audit logs, activity logs, flow logs, identity logs, and console access records to protected storage. Disk images alone rarely explain how the compromise happened.
-
Stabilize writes when safe.
If business and legal requirements allow, stop application writes, unmount data volumes, or stop the instance before snapshotting. If stopping the instance would destroy volatile evidence or cause unacceptable downtime, document why a live snapshot was used.
-
Create snapshots of every relevant disk.
Capture the root disk and all attached data disks. For multi-disk systems, prefer provider features that preserve crash consistency across volumes when available. Name snapshots with the case number, source instance ID, disk ID, and collection time.
-
Protect the snapshots immediately.
Apply restrictive IAM permissions, retention tags, encryption settings, and deletion protection where available. Avoid sharing snapshots broadly or moving them into accounts that do not have evidence handling controls.
-
Create forensic working copies.
Do not analyze the only preserved snapshot directly. Restore snapshots into new disks in an isolated forensic account, project, or subscription. Attach them read-only when the platform supports it, or mount them read-only inside the analysis system.
-
Export or image the restored disk if required.
Some investigations require a raw, VHD, VMDK, or E01-style evidence file for lab tools. Export the restored disk through approved provider methods or acquire it from a controlled forensic workstation.
-
Calculate and record hashes.
Generate SHA-256 hashes for exported image files and important evidence packages. Store the hash values in the case record and verify them before analysis, transfer, or handoff.
-
Document every access and transfer.
Record who accessed the snapshot, who restored it, where the image was stored, when hashes were calculated, and which tools were used. This documentation is as important as the technical acquisition.
Provider-Specific Snapshot Considerations
Cloud providers offer snapshot features that are useful for evidence preservation, but each platform has details that matter. A sound process should reference the provider’s official documentation and preserve the settings used during acquisition.
In AWS, Amazon EBS snapshots can be created for individual volumes or for multiple volumes attached to an EC2 instance. AWS documentation notes that snapshots capture data written to the volume at the time the request is made, but not data cached by the operating system or applications. This is why pausing writes, unmounting volumes, or stopping the instance can improve consistency when it is safe to do so.
In Azure, managed disk snapshots are read-only copies of virtual hard disks that exist independently of the source disk and can be used to create new managed disks. Microsoft also recommends cleanly shutting down a VM before using a snapshot to create a new VM, because that clears processes in progress.
In Google Cloud, snapshots can be created from Persistent Disk or Hyperdisk volumes, including disks attached to running instances. Google also provides guidance on preparing disks before snapshots and warns that applications should only resume after the snapshot resource reaches the appropriate upload state when applications were paused for consistency.
| Provider | Common Evidence Method | Key Caution |
|---|---|---|
| AWS EC2 | Create EBS snapshots for root and data volumes, then restore copies for analysis. | Cached application or operating system data may not be included unless writes are handled properly. |
| Azure Virtual Machines | Create managed disk snapshots, then create new managed disks from those snapshots for examination. | Clean shutdown can improve consistency when the snapshot will be used to create a new VM. |
| Google Compute Engine | Create disk snapshots from zonal or regional disks, then restore to separate analysis disks. | Snapshot location, disk preparation, and application consistency should be documented. |
| Any Cloud Platform | Preserve snapshots, audit logs, metadata, and access records together. | A disk snapshot without logs may not explain how the compromise occurred. |
Maintaining Chain of Custody in Cloud Environments
Chain of custody is the documented history of evidence handling. In cloud forensics, this includes both human actions and cloud control plane events. The goal is to show that the evidence came from the correct source, was collected by authorized people, was protected from unauthorized changes, and remained intact during storage and transfer.
A practical chain of custody record should include the case number, evidence ID, source resource ID, collection method, collector identity, timestamps, storage location, hash values, and every transfer or access. Cloud audit logs can support this record, but they should not replace a human-readable custody log.
Use naming conventions that make evidence easy to identify without exposing sensitive details. For example, a snapshot name can include a case number, provider, source instance ID, volume ID, and UTC collection time. Avoid names that include customer secrets, personal data, passwords, or unsupported conclusions such as “ransomware-root-disk-proven” before analysis is complete.
- Assign a unique evidence ID to each snapshot, export, log bundle, and restored disk.
- Record timestamps in UTC and include the responder’s local time zone when useful.
- Store snapshots and exported images in restricted evidence accounts or storage buckets.
- Use encryption keys controlled by the investigation or security team.
- Keep original snapshots separate from working copies used for analysis.
- Record SHA-256 hashes for exported images and transferred evidence packages.
- Review cloud audit logs to confirm who created, copied, shared, restored, or deleted evidence resources.
How to Reduce Evidence Contamination
Evidence contamination happens when response actions change the data you later want to analyze. In cloud environments, contamination can come from logging into the compromised instance, running endpoint tools, installing agents, rebooting, detaching disks incorrectly, changing permissions, or letting automated remediation scripts modify files.
One safer pattern is to avoid interactive login whenever possible. Use cloud control plane actions to capture snapshots and metadata. If host access is necessary, document the commands used, the reason for access, the account used, and the expected impact on the system.
For analysis, restore snapshots to a separate forensic environment. Attach disks read-only when possible. If the cloud platform does not provide a read-only attach option for your case, mount the file system read-only inside the analysis operating system. Never boot the restored compromised disk as a normal production server unless you intentionally need behavioral analysis in an isolated lab.
| Action | Possible Impact | Safer Alternative |
|---|---|---|
| Logging into the compromised instance | Changes shell history, access logs, timestamps, and possibly attacker awareness. | Collect snapshots and metadata through the cloud control plane first. |
| Rebooting before collection | Destroys memory evidence and may rotate logs or remove temporary files. | Capture volatile evidence first when authorized and technically possible. |
| Running cleanup scripts | Deletes attacker tools and changes file system state. | Preserve evidence first, then remediate from a documented recovery plan. |
| Analyzing the original snapshot directly | Creates confusion between preserved evidence and working evidence. | Keep the original snapshot locked and analyze restored copies. |
| Sharing snapshots broadly | Exposes sensitive data and weakens custody control. | Use restricted evidence storage and case-specific access approval. |
Handling Encryption, IAM, and Cross-Account Evidence Storage
Encryption is often one of the most important details in cloud evidence collection. If a disk is encrypted with a customer-managed key, responders must preserve access to that key. If the key is disabled, scheduled for deletion, rotated without planning, or controlled by a compromised account, the snapshot may become difficult or impossible to use later.
IAM controls should separate responders, analysts, and administrators. The person who creates the snapshot does not always need permission to delete it. The analyst who mounts a restored copy does not always need permission to share the original snapshot. This separation reduces accidental deletion and limits the damage if one credential is later found to be compromised.
For higher-risk investigations, consider copying evidence into a dedicated security account, project, or subscription. This can protect evidence from compromised production roles. However, cross-account copying must be documented carefully, including source ID, destination ID, encryption key, time, user, and reason for transfer.
Be especially careful with snapshots that contain regulated data, customer records, secrets, SSH keys, API tokens, database files, or personal information. A forensic copy should be treated as sensitive production data, not as a harmless backup.
Validating the Image After Extraction
Validation proves that the evidence you analyze is the evidence you collected. For provider-native snapshots, the first validation step is confirming that the snapshot exists, has completed successfully, belongs to the expected source disk, and is stored in the expected account, region, project, or subscription.
When you export an image to a file, calculate a cryptographic hash such as SHA-256. Record the command, tool version, file name, file size, timestamp, storage path, and hash value. Verify the hash again after transferring the image to another storage location or forensic workstation.
For restored working copies, compare metadata against the original evidence record. The restored disk should trace back to the original snapshot, and the original snapshot should trace back to the compromised source disk. This relationship should be clear enough that another responder can reproduce the evidence path from the case notes.
sha256sum case-1042-aws-i-0123456789abcdef0-root-volume.raw
The command above is only an example of hashing an exported evidence file on a Linux forensic workstation. The important point is not the specific tool name, but the repeatable process: hash, record, protect, transfer, and verify again.
Common Mistakes That Weaken Cloud Forensic Images
Many cloud evidence problems come from speed without documentation. Responders may create a snapshot quickly, but forget to record the source disk, snapshot state, encryption key, collector identity, or exact time. Later, the team may know that a snapshot exists, but not be able to prove why it matters.
Another common mistake is collecting only the root disk. Compromised workloads often store application data, logs, malware payloads, database files, temporary archives, or attacker staging tools on separate data disks. If the instance had multiple attached volumes, each one should be considered during scope review.
Teams also sometimes terminate or rebuild the instance too soon. Remediation is important, but destroying the original system before the evidence package is complete can make root cause analysis harder. A better workflow is to preserve evidence, isolate risk, rebuild clean infrastructure, and then analyze the preserved copies.
| Mistake | Why It Causes Problems | Better Practice |
|---|---|---|
| No written authorization | Creates legal and internal governance risk. | Get approval and record the scope before collection. |
| Only capturing the root disk | Misses evidence on attached data volumes. | Inventory and snapshot all relevant disks. |
| No hash values | Makes later integrity verification weaker. | Hash exported images and evidence bundles. |
| Analyzing original evidence | Confuses preservation with investigation activity. | Preserve originals and analyze working copies. |
| Ignoring cloud logs | Loses visibility into access, privilege changes, and snapshot handling. | Export audit, identity, and network logs early. |
| Leaving broad access to snapshots | Exposes sensitive data and weakens custody. | Restrict access by case role and monitor every action. |
When to Involve a Professional Forensic Team
You should involve a professional forensic team when the incident may involve legal action, regulated data, customer notification, financial fraud, insider activity, ransomware, destructive malware, law enforcement, or a material business impact. In those cases, evidence mistakes can have consequences beyond technical recovery.
Professional help is also important when you need memory acquisition, malware reverse engineering, timeline reconstruction, multi-cloud evidence correlation, or expert reporting. Cloud snapshots are useful, but they are only one part of a complete forensic investigation.
If the environment is still actively compromised, bring in incident response support before taking aggressive actions. A trained team can help balance containment, business continuity, evidence preservation, and recovery. In many cases, the safest path is to capture evidence, isolate the workload, preserve logs, rotate credentials, and rebuild clean systems rather than trying to repair a possibly backdoored instance.
Conclusão
Extracting forensically sound cloud instance images requires more than pressing a snapshot button. A defensible process includes authorization, careful scoping, provider-native snapshot creation, protected storage, chain of custody, hash validation, and clear separation between preserved originals and working copies.
The safest workflow is to document the instance, preserve logs, capture all relevant disks, protect the snapshots, restore copies in an isolated forensic environment, and validate exported images with repeatable integrity checks. This approach reduces contamination and gives analysts a stronger evidence base for root cause analysis.
Forensically sound cloud instance images are especially important when an incident may involve legal, regulatory, financial, or customer impact. When the stakes are high, involve qualified forensic and cloud security professionals early so evidence collection supports both recovery and accountability.
FAQ
1. Is a cloud snapshot the same as a forensic disk image?
No. A cloud snapshot is usually a provider-managed point-in-time copy of a disk, while a forensic disk image is commonly an evidence file acquired and validated for analysis. A snapshot can be part of a forensic process, but it becomes stronger evidence when responders document the source, preserve custody, restore a controlled copy, export or acquire an image if needed, and calculate hashes. The snapshot alone may not include memory, cached data, external logs, or other cloud resources used by the compromised instance.
2. Should I stop the compromised instance before taking a snapshot?
It depends on the investigation priority. Stopping an instance can improve disk consistency because fewer writes are happening, but it can also destroy volatile evidence such as memory contents, active network connections, and running processes. If the case may require memory analysis, collect volatile evidence first when authorized and technically possible. If disk consistency is more important and downtime is acceptable, stopping or cleanly shutting down the instance before snapshotting may be safer. Always document the decision and the reason behind it.
3. What should I collect besides the disk image?
Collect cloud audit logs, identity activity, network flow logs, firewall changes, security group history, instance metadata, IAM role information, console login records, storage access logs, and relevant application logs. A disk image may show files and artifacts on the system, but cloud logs often explain how the attacker gained access, what permissions were used, whether snapshots were shared, and whether data was accessed outside the instance. For a complete investigation, preserve both host-level and cloud control plane evidence.
4. How do I avoid changing evidence during collection?
Start with cloud control plane actions rather than logging into the compromised machine. Record metadata, preserve logs, and create snapshots before running tools on the host. If host access is unavoidable, use a clean responder account, record every command, and avoid cleanup or remediation steps until evidence is preserved. Restore snapshots into a separate forensic environment and analyze working copies instead of originals. Mount restored disks read-only when possible, and calculate hashes for exported evidence files before and after transfer.
5. Do I need to capture every attached disk?
In most serious investigations, yes, or at least you should document why a disk was excluded. Attackers and applications may store evidence outside the root volume, including logs, payloads, archives, databases, scripts, and temporary files. Cloud instances often use separate data volumes for performance or storage reasons. Before collection, list all attached disks and map them to the instance. If a disk is clearly unrelated, record the reason. If there is uncertainty, preserving it is usually safer than discovering later that critical evidence was missed.
6. How should I name forensic snapshots?
Use names that help investigators identify the evidence without exposing sensitive information. A practical format can include the case number, provider, instance ID, volume ID, and UTC collection time. For example, a name can show that the snapshot belongs to a specific incident and source disk. Avoid names containing personal data, customer names, secrets, passwords, or final conclusions before analysis is complete. Good naming reduces confusion, supports chain of custody, and makes it easier to match snapshots with case notes and audit logs.
7. Why are hashes important if the cloud provider stores the snapshot?
Provider snapshots are managed resources, so you may not always hash the snapshot object directly in the same way you hash a local image file. However, when you restore, export, package, or transfer evidence, hashes become essential. A SHA-256 hash of an exported image or evidence bundle helps prove that the file analyzed later is the same file collected earlier. Hashes should be recorded with the file name, size, tool used, timestamp, and storage location. Rechecking the hash after transfer helps detect corruption or unintended changes.
8. Can I analyze the restored disk by booting it as a new VM?
Booting a restored compromised disk can change logs, timestamps, services, registry data, temporary files, and application state. It may also activate malware or attacker persistence. For normal forensic review, attach the restored disk to an isolated analysis machine and mount it read-only when possible. Booting may be appropriate only for controlled malware behavior analysis or service reconstruction in a lab network with strict isolation. If you boot the image, document why, how the lab was isolated, and what changes may have occurred.
9. What if the disk is encrypted?
Preserve the encryption context immediately. Record the key ID, key owner, access policy, region, and any dependency on customer-managed keys. Make sure the investigation team can still decrypt restored copies before disabling accounts, rotating keys, or changing policies. If a key is deleted, disabled, or locked behind compromised permissions, evidence access may be affected. Treat encryption keys as part of the evidence handling plan. Restrict who can use them, log their use, and avoid moving encrypted evidence to locations where the key cannot be used legally or technically.
10. Are memory images required for cloud forensic investigations?
Memory images are not always required, but they can be valuable when the incident involves active malware, fileless activity, encryption keys in memory, suspicious processes, or live attacker sessions. The difficulty is that memory acquisition in cloud environments is more invasive and provider-dependent than disk snapshotting. Some teams may need endpoint response tools or specialized support. If memory matters, collect it before stopping or rebooting the instance. If memory cannot be collected, document that limitation clearly in the case record.
11. Where should forensic images be stored?
Store forensic images in a restricted evidence location, ideally separate from the compromised production environment. Use strong access controls, encryption, retention rules, logging, and deletion protection when available. Limit access to people assigned to the case. Avoid storing evidence in personal drives, unmanaged buckets, public shares, or general team folders. Evidence storage should preserve confidentiality as well as integrity, because snapshots may contain customer data, credentials, API keys, database files, and other sensitive information from the compromised workload.
12. When is a forensic image not enough to understand the compromise?
A forensic image is not enough when the attack path depends on cloud identities, exposed storage, metadata service abuse, stolen API keys, external databases, container orchestration, serverless functions, or network control plane changes. In those cases, the disk may show only part of the story. You may need audit logs, IAM history, cloud configuration snapshots, object storage access logs, container registry records, DNS logs, and application telemetry. Cloud incidents often cross service boundaries, so evidence collection should follow the attacker’s likely path, not only the VM disk.
Editorial note: This article is for educational and defensive incident response purposes. It does not replace a professional forensic investigation, legal review, or cloud security audit when an incident involves regulated data, customer impact, legal proceedings, or high business risk.
Official References
- AWS Documentation — Create Amazon EBS snapshots
- Microsoft Learn — Create a snapshot of a virtual hard disk
- Google Cloud Documentation — Create archive and standard disk snapshots
- NIST — Cloud Computing Forensic Science Challenges

Dorian Vale is a cybersecurity analyst and infrastructure security specialist with over a decade of hands-on experience in enterprise network defense, incident response, and cloud security architecture. He has spent years working inside SOC environments, configuring SIEM pipelines, and hardening hybrid cloud deployments for mid-sized organizations. His writing focuses on translating complex security concepts into practical, actionable guidance for IT teams and security professionals managing real-world infrastructure.